Template:The Ossuary
- This level occupies the map slot E4M1. For other maps which occupy this slot, see Category:E4M1.
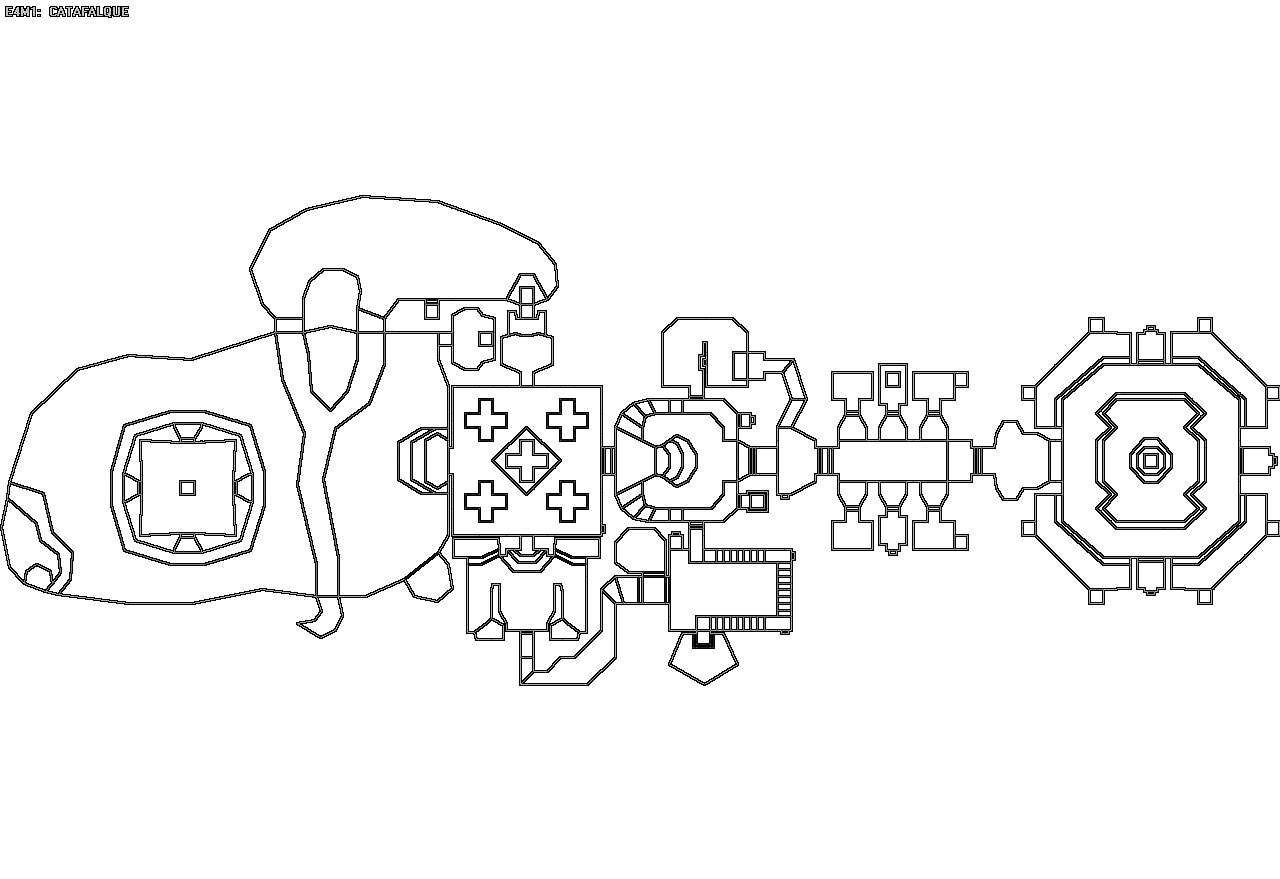
E4M1: Catafalque is the first level in The Ossuary episode of Heretic Shadow of the Serpent Riders.
Map of E4M1
Walkthrough
(To be written)
Secrets
- In the south end of the room behind the yellow door is a door leading to a room with dead disciples hanging from the ceiling. There are some gauntlets at the top of the steps. Once you get the gauntlets, a small opening is revealed on the west side of the room. This opening has a secret door which leads to a passage containing some greater runes. The passage leads back to the starting room.
- The dark, underwater lake to the north (with all the Ophidians) has two impassable openings to the south, which lead to the tower courtyard. To the east of these openings, on the south side of the room, is a secret door which leads to a teleporter. The teleporter takes you to a high ledge with a chaos device and some claw ammo.
- Behind the green door are six pictures of saints. The middle one to the south has a secret door behind it which leads to a switch. Going through this secret door opens up doors behind all the other saints. After you hit the switch, through the rightmost door to the north, you will find a ring and a teleporter which takes you to the ledges in the room to the east
Strategies
This is easily the most difficult level in the fourth episode, due to the general lack of weapons and ammo. The black plague difficulty can in fact be easier than the smite-meister difficulty, since the former adds 1.5x the ammo but does not increase the enemies' health. In either case, the entire level will become a battle of balance between your health and your ammo. If you take your time, you can't possibly kill everything before you're only left with melee weapons, but if you run around collecting ammo, you'll get hurt badly. All you can do is kill what you must, and leave what isn't worth killing. The Maulotaur in the courtyard in particular is something that is not worthy of your weapons. The crusher in the middle of the level is ideal for kills if you can use it right.
For those that believe that 100% kills are necessary, some tricks can still win out. The Tome+Gauntlets can run out the Maulotaur's health. Also, some weapons acquired near the end of the level can be used to kill anyone who hasn't been killed yet.
Screenshots
")
")
")